|
Here are the results of the first challenge shown in a slideshow applet. Below that are the separate images together with a resume of how they were achieved by the players. Take a coffee break while this is loading, because all images are here at full size.....takes a few minutes |
|
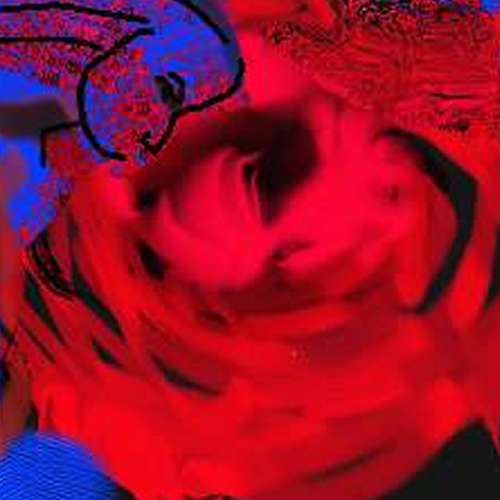
1. Ann's original image "I did this
|
|
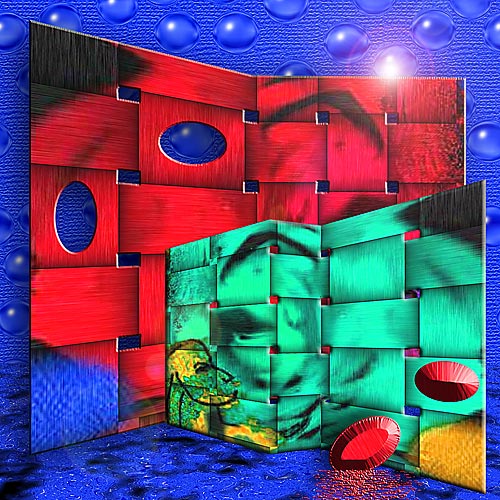
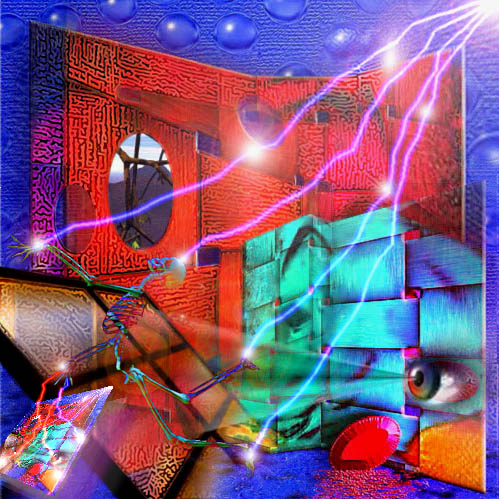
2. Lin's additions Increased the resolution from 72ppi to 200 to work on the image. In Photoshop, with original colours unaltered, selected all and copied to a new layer, applied Eye Candy Weave, turned, bent and shaped into 'screen' using Edit:Transform: Perspective, Skew and Rotate. Applied Layer style:Bevel and emboss, Drop shadow. Copied the layer, turned and flipped it, changed colours, shrunk size, layer style: bevel, drop shadow. Used the original blue from the image for a new background layer, Texturiser: burlap, Eye Candy water drops, Render:Lens flare, Flaming Pear Flood. Cut ellipses from red screen, placed and applied Layer style : bevel & emboss at various settings to them, Flaming Pear flood. Sharpened where needed, flattened to one layer, resized to 72ppi, sharpened again and saved as .jpg.
|
|
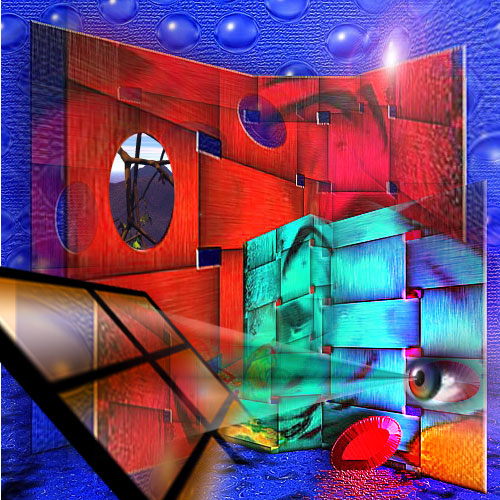
3. Charlene' additions I used PS 5.5 and selected a few sweet areas of the picture, feathered the selection 30 pixels, then copied and pasted this selection onto another layer. On these areas, I did a scale and perspective transformation. I copied and pasted some of my other images onto the graphic, again doing a perspective transformation on these areas. One of the circles looked like a window to me, so I copied and pasted one of my outdoor Bryce scenes into this area.
|
|
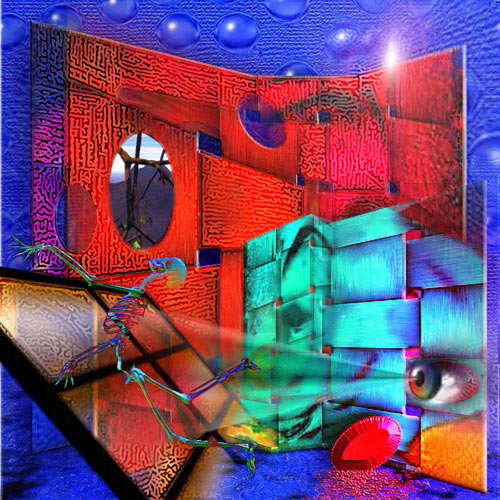
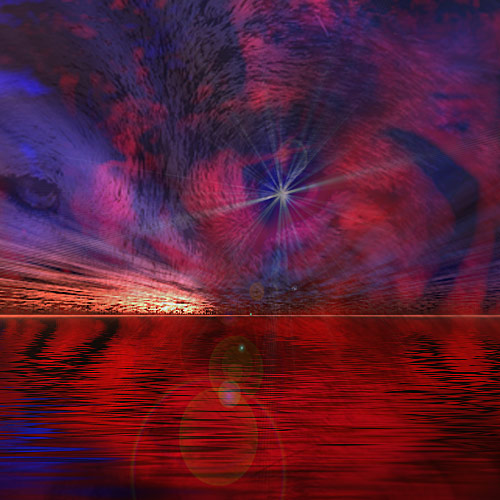
4. Sky Dancer's additions In Photoshop I duplicated the image and set it to 200ppi
resolution, then used the KPT 6 Reaction filter. The reaction seed was "Source
Image" and the Apply Mode was "Raw Greyscale". Width was
set to 5 and diffusion to 50%. Then I clicked the check mark for to apply
the filter.
|
|
5. Brian(UK)'s additions 1. Adjusted Contrast & Brightness (reduced)
|
|
6. Rick's additions -Created duplicate of original background layer -Used Flaming Pear Flood filter to create the water on the duplicate layer. Set Blending mode to Multiply. -Using Free Transform, enlarged original background layer, then used Radial Blur, Zoom for a 20 Pixel blur. Set layer opacity to 62% -Used KPT Sky Effects to create the sky look on a blank layer. Changed blend mode on this layer to Lighten. -Created lens flare in Photoshop. On new blank layer. - Imported photo of a wolf I shot last weekend. Used free transform to enlarge image, layer mask to hide edges. Layer Blending to Multiply, and Opacity to 53%.
|
Well done everybody and thank you for taking part!
Watch out for the Next Ping-Pong Challenge,
coming soon to a monitor near you....
|
|